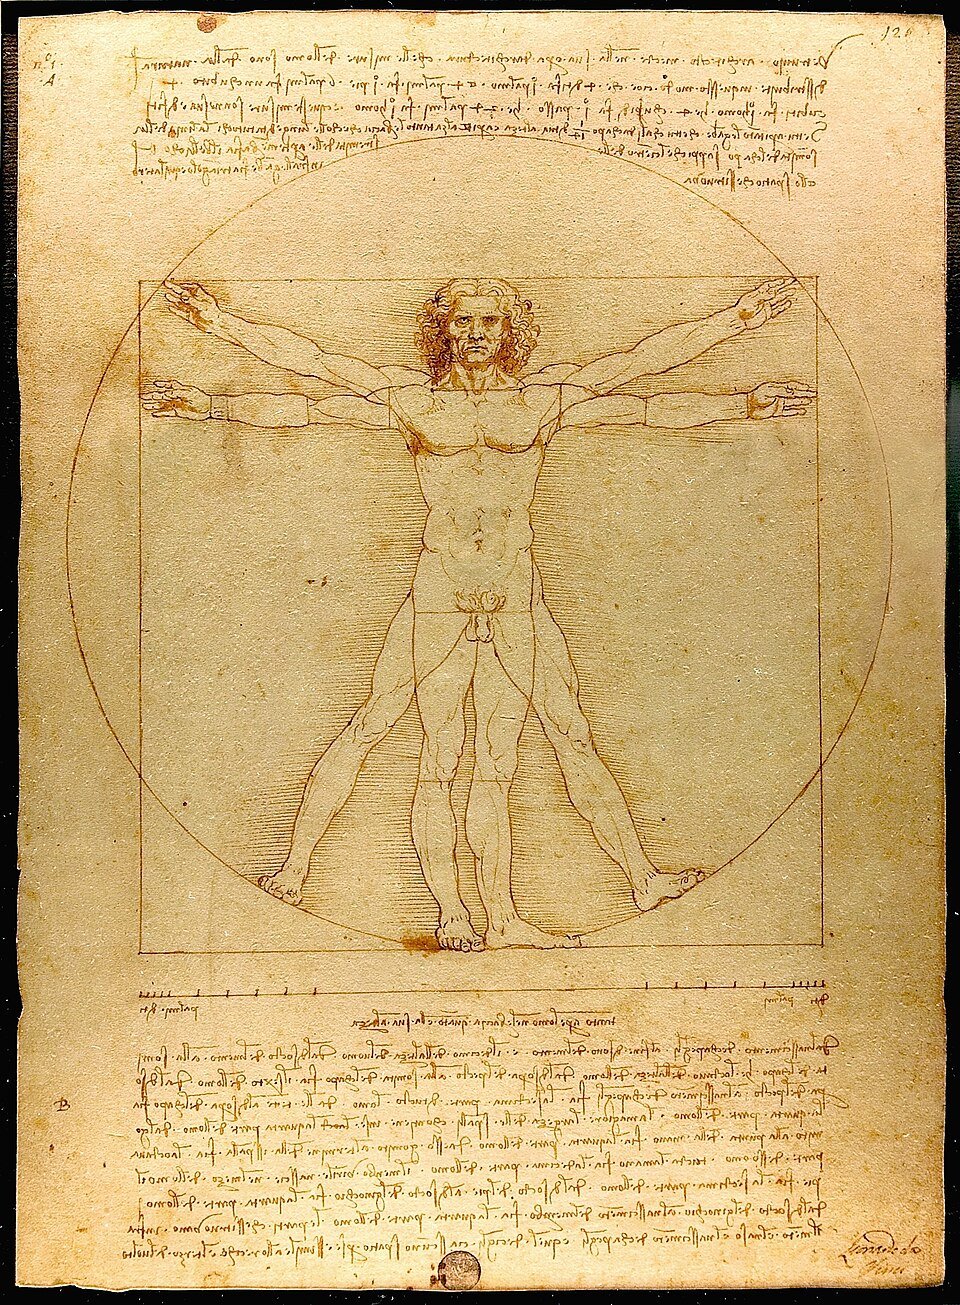
Leonardo da Vinci - A male nude figure demonstrating ideal human body proportions based on Vitruvian principles.
This analysis was generated by ArtDecode AI from an image of the artwork. It may contain inaccuracies; use it as an educational guide.
Loading high-res image...
Using continuous and controlled lines to define the contours and structures of the figure with clarity and precision.
Creating shading and texture through overlapping sets of parallel lines at angles to build depth and volume.
Applying diluted ink in successive layers to produce tonal variations and subtle gradients.
Following the natural curves of the form with fine lines to convey roundness and anatomical detail.
Softening transitions between dark and light areas by carefully layering ink tones for smooth effects.
Incorporating basic shapes like circles and squares to structure the composition and illustrate proportion principles.
Drawing overlapping figures within the same space to demonstrate movement or dual positions as seen in the Vitruvian Man.
Using precise, delicate strokes to capture small anatomical features and texture accurately.
sepia
beige
brown
tan
light brown
off-white
For creating precise, consistent lines that are ideal for detailed outlines and intricate work.
Pro Tip: Use different nib sizes to vary line weight, adding depth and interest to your drawing.
To draw perfect circles essential for the geometric framework of the Vitruvian Man.
Pro Tip: Keep the compass point steady and rotate gently to ensure smooth, consistent circles.
For drawing exact lines and squares ensuring geometric accuracy in your composition.
Pro Tip: Use a metal ruler for a smooth cut and better grip when inking along the edge.
To apply ink washes and shading with controlled fluidity and tonal variation.
Pro Tip: Test ink flow on scrap paper before working on the final piece to avoid blotches.
Ideal for adding delicate hatching and small details in ink.
Pro Tip: Keep brushes clean and avoid overloading with ink for sharper lines.
To remove pencil guidelines after inking without damaging the paper surface.
Pro Tip: Use a soft kneaded eraser pressed gently to prevent paper abrasion.
Ink
Brands: Winsor & Newton, Sennelier
Ink
Brands: Dr. Ph. Martin’s, Higgins
Ink
Brands: Liquitex, Faber-Castell
Ink
Brands: Private Reserve, Pelikan
Colored Pencil
Brands: Prismacolor, Derwent
Paper
Brands: Strathmore, Canson
Colored Pencil
Brands: Caran d’Ache, Staedtler
Colored Pencil
Brands: Faber-Castell, Lyra
Start by collecting all the necessary materials such as ink in various shades including sepia and brown, high-quality paper (preferably off-white or beige), and precise drawing tools like technical pens and rulers. Ensure your workspace has good lighting and a clean flat surface. Prepare a reference image of Leonardo da Vinci's Vitruvian Man to guide your proportions and composition. Organize your materials so that everything is within easy reach to maintain focus and flow throughout the drawing process.
Begin by carefully sketching the main geometric framework that contains the figure — a perfect circle and a square. Use a compass to draw the circle and a ruler to create the square, ensuring both are centered symmetrically on your paper. The circle and square need to be proportioned correctly to fit the figure. Lightly draw these shapes in pencil using a beige or tan colored pencil to allow for easy correction. This structure is essential because it showcases the Vitruvian principles of proportional harmony.
With the geometric framework established, start sketching the male figure’s basic pose within the shapes. The figure should be frontal and symmetrical with arms and legs extended in two different positions. Use light pencil lines to hint at the dual positioning of limbs. Focus on key anatomical points: head, torso, arms, and legs. Pay close attention to the proportions inspired by Vitruvius' guidelines, aiming for a balance between each extended limb that fits precisely inside the circle and square.
Refine your sketch by adding more anatomical detail with soft pencil strokes in tan and light brown shades to enhance depth. Carefully render muscle tones, joints, and body contours while maintaining the ideal symmetry Leonardo da Vinci emphasized. Emphasize the natural curves and realistic human anatomy while keeping the dual limb positioning distinct. This step requires patience and observation of proportions to reflect the harmony between geometry and the human figure.
Switch to ink to carefully trace over the pencil outline. Use a technical pen with a fine nib for precise detail. Begin outlining the outer circle and square with sepia or brown ink to create a warm, classic tone reminiscent of Leonardo's original drawing. Next, ink the outer edges of the figure's body using a slightly darker brown. Take your time to avoid smudging and maintain clean lines. Use smooth, consistent strokes to replicate the delicate but confident style of Leonardo.
Once the main outlines are dry, proceed with shading to convey the figure’s volume and muscle structure. Utilize cross-hatching and parallel hatching techniques with brown and light brown ink to create shadows and highlights. Focus shading on curved areas like muscles and around joints, letting the lighter tan or beige paper show where light hits the figure. This layering method imitates Leonardo’s intricate detail in the original drawing and enhances the three-dimensional feel of the artwork.
Work on the second position of the arms and legs by using lighter shades of sepia or tan ink. Layer these lines over the first to depict the superimposed limbs sensitively, ensuring they don’t overpower the primary form. Keep lines thin and slightly translucent where appropriate to maintain clarity in the dual posture representation. Pay close attention to the anatomical accuracy for both sets of limbs, balancing visibility with subtlety just like da Vinci’s original technique.
Return to the geometric circle and square, reinforcing these shapes with darker ink to frame the figure clearly. Add minor ink details to imply texture or shading on the outer edges without distracting from the figure. Use off-white and beige ink washes sparingly around the background to subtly distinguish it from the main composition. Leonardo’s Vitruvian Man revolves around the harmony of the shapes, so these refinements give the artwork structural balance and aesthetic completeness.
Once all the ink is completely dry, gently erase any remaining pencil marks to clean up the drawing. Check the artwork for any areas that need additional ink tidying or enhancement. You might add some delicate ink touches in light brown or sepia to reinforce shadows or highlights. Keep your hand steady and make sure not to damage the paper while erasing. This step perfects the artwork’s clarity and presentation, making it ready for display or further analysis.
Finally, sign your artwork discreetly in a corner with sepia or brown ink to mimic da Vinci’s subtle style. To preserve its longevity, consider framing behind UV-protective glass or storing it in acid-free sleeves. Avoid exposure to direct sunlight and high humidity to maintain the sepia and brown hues on your ink drawing. Preserving the piece respectfully honors Leonardo da Vinci’s original masterpiece, ensuring your recreation can be appreciated for years to come.
Platform: YouTube
Platform: YouTube
Platform: YouTube
Platform: YouTube
Platform: YouTube
Platform: YouTube
Winsor & Newton Sepia Ink 14ml
Strathmore Off-White Drawing Paper Pad
Faber-Castell Colored Pencil Set
Kuretake Brush Pen for Ink Drawing
Staedtler Ruler 30cm Metal Edge
Prismacolor Kneaded Eraser